Pecan Pumpkin Pie

Just in time for the holidays, I present to you the Pecan Pumpkin Pie. This is a pie for those who want to bake something for their holiday dinner and can’t decide which one to concoct. And this is also a pie for those of you that can’t decide which slice you want for dessert. This tasty pie comes courtesy of The Gourmet Cookbook, edited for the maximum delicious by Ruth Reichl.

The crust:

1 1/4 cups all-purpose flour

1 stick (8 tbsp) cold, unsalted butter cut into 1/2-inch squares

1/4 tsp salt

3-4 tbsp ice water

Blend together flour, butter, and salt in a bowl with your fingertips, or pastry blender (or do what I did and pulse in a food processor) until mixture resembles a course meal with pea-size lumps of butter. Evenly add 3 tablespoons of ice water in mix and mix (or pulse) until combined. Squeeze a small handful of dough: if it doesn’t hold together add ice water a half tablespoon at a time, mixing or pulsing until incorporated. Don’t overwork the dough or pastry can become tough, which is great for street fighting but not pie making.

Turn dough onto work surface and split into 4 portions. With the palm of your hand, smear the portions in a forward motion to help distribute the butter. Gather the dough together into a ball. Place dough on plastic wrap. Press it into 5 inch disk. Wrap and place in refrigerator until firm, at least an hour. The dough can be kept for up to 1 day, just so you know…

While you’re waiting for the dough to firm up, make your fillings.

The pumpkin filling:

3/4 cup canned, solid pack pumpkin

2 tbsp packed light brown sugar

1 large egg, lightly beaten

2 tbsp sour cream

1/8 tsp ground cinnamon

1/8 tsp ground nutmeg

In a large bowl, mix all ingredients until smooth. Set aside.

The pecan layer:

3/4 cup light brown syrup

1/2 cup packed light brown sugar

3 large eggs, lightly beaten

3 tbsp unsalted butter, melted and cooled

2 tsp vanilla extract

1/4 tsp finely grated lemon zest

1 1/2 tsp fresh lemon juice

1/4 tsp salt

1 1/3 cups (5.5 oz.) pecans, chopped if you need to do such a silly thing

In a large bowl, mix corn syrup, brown sugar, eggs, butter, vanilla , zest, and lemon juice until well combined. Stir in pecans. Set aside.

Yay! now you just have to assemble everything…

Place oven rack in center position. Pre-heat your oven to 375F. It’ll take about 8 minutes to heat up. that will provide you the time to get your pie shell ready.
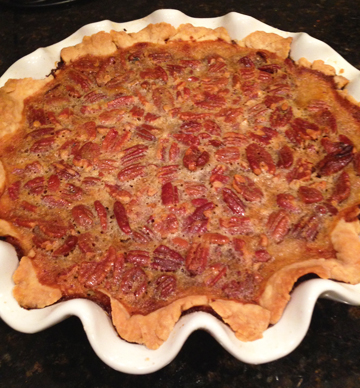
Pecan Pumpkin Pie

Pecan Pumpkin Pie


Roll out your dough on a lightly floured surface, using a rolling-pin to make a 13 inch circle. Transfer to a 9 inch pie plate and trim excess to leave a 1/2 inch overhang. fold it under and crimp the edge as desired. Lightly poke the crust in several places along bottom with a fork and refrigerate for 30 minutes if desired  (I didn’t put it in the fridge). Line with foil and place pie weights, rice or dried beans onto foil. Place on center rack and bake for 20 minutes. carefully remove foil and weights and bake pie shell until lightly golden, 6-10 minutes more. Remove from oven (leave oven on) and allow shell to cool.

Once shell is cool, evenly spread pumpkin filling over bottom of shell.

Carefully spoon pecan filling over pumpkin layer.

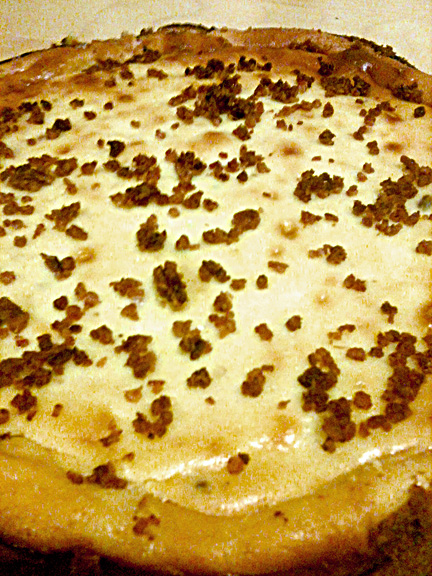
Bake the pie until crust is golden and filling is puffed, about 35 minutes (center should still be slightly jiggly). Cool completely on a rack.

The flavor of this pie really pops. It gives both the smooth spiciness of the pumpkin layer and the sweet caramelized pecan layer.  It’s like a festive holiday in your mouth! The interesting thing about the flavor is that it’s so sweet, even with less-than-usual sugar fixing. I really enjoyed baking this because it was pretty easy. And the wait is worth the effort. My wife liked it too and suggested this be a tester for Thanksgiving. This pie will be one of the few (I’m not sure how many I’ll make, maybe 3) I end up making for the holiday. Have a great Thanksgiving and if I don’t add to the blog during this most wonderful time of the year, have a great holiday:)


Advertisement

Schadenfreude Pie (Insert Maniacal Laughter Here)

Wikipedia defines Schadenfreude (pronounced shah-den-froy-da) as  a feeling of joy or pleasure when one sees another fail or suffer misfortune. It’s a dark and heavy emotion, which can come in quite handy when attending the 50th birthday celebration of a friend:) I’m not a jerk, I’m just not 50 yet (but almost).  This is more of a savory pie, both dark and bittersweet, with quite a bit of heft. It’s both dense and heavy.  Just like Schadenfreude. I attribute this pie to John Scalzi over at Whatever. The original posting is from 2006 and sent along to me by Alicia:) Thank you.

The crust:

Pre-made 9 or 10 inch graham cracker pie crust. I recommend 10 inch as you will have leftover filling if you choose the 9 inch crust.

Dark, heavy, bittersweet and tasty. Suffer, you!

Dark, heavy, bittersweet and tasty. Suffer, you!

The filling:

1 cup dark brown sugar

1 cup dark corn syrup

1/2 cup molasses

1/2 cup (1 stick) butter, melted

1/2 cup semi-sweet chocolate chips or chunks

3 large eggs

2 tsp. cinnamon

1-2 splashes Kahlua or other coffee liqueur

Pre-heat oven to 375 F. In a large mixing bowl add melted butter, corn syrup, molasses, brown sugar and cinnamon. Mix well. Melt chocolate and blend into syrup mixture. Add eggs and coffee liqueur; blend until mixture has smooth consistency. Pour mixture into your pie crust. Smile in sinister fashion.

Place on center rack in oven, bake for about 45-50 minutes. At 45 minutes, poke pie with butter knife. If it comes out clean, pie is ready; otherwise give it five more minutes.

Once pie is out of oven, let it set about 20 minutes if you are desiring to eat right away. When I took it out of the oven, it actually looked like it was breathing. It freaked me out a little.

John’s rec (and I agree) is that this be eaten in small slices. It’s really rich and very heavy, and you’ll regret eating a large slice. And this would make me happy:) Have with a scoop of ice cream or a large glass of cold milk for maximum joy.

Lemon Macaroon Pie

The is before piping. For this one I wasn't going for presentation. It was really tasty.

Lemon Macaroon Pie before piping. Low quality presentation, high quality taste.

Happy Day-After Thanksgiving:) I hope everyone who wanted to be with family and friends enjoyed their holiday. I wanted to post this earlier than today but didn’t have my to-do list organized well enough to bake the pie until the morning of turkey day.  This is the recipe for a Lemon Macaroon pie. It is attributed to the Bon Appetit Dessert Cookbook by Barbara Fairchild and was done almost to the letter (as best I could). I wanted to do something besides the traditional pie fare, but I baked 3 pumpkin pies too.

The Crust:

1 cup unbleached all-purpose flour

1/2 cup cake flour

t tbsp. sugar

1/2 tsp. salt

8 tbsp. butter

3 tbsp. water

Blend the flour, sugar and salt in a food processor. Add the butter, using on/off turns until the mix resembles a coarse meal. Add the water and blend until moist clumps form. Remove from processor, wrap in plastic wrap and refrigerate for at least one hour.

Set oven to 350F. Place rack in bottom third of oven.

Remove dough from fridge and roll to 12 inch circle. Place in 9 inch pie dish and trim so there’s half-inch of overhang. Fold under and crimp the edges. Or not. I wasn’t in it for presentation at this particular outing. Freeze for 15 minutes.

Remove from freezer, line bottom with foil and add beans or pie weights. Place in oven for 20 minutes or until edges or golden brown. Remove from oven, allow to cool, remove weights and foil. Set aside. Leave oven at temperature.

The Filling:

3 large eggs

2 large egg yolks

1/4 tsp. salt

1 1/4 cups sugar

1 1/4 cups sweetened flake coconut

1/4 cup chilled heavy whipping cream

1/4 cup fresh lemon juice

2 tbsp. melted butter

2 tsp. grated lemon peel

1 1/2 tsp. vanilla extract

1/2 tsp. almond extract

Using an electric mixer, beat the eggs, egg yolks and salt in a large bowl. Add sugar and beat until thick and fluffy. Beat in coconut, whipping cream, lemon juice, lemon peel, butter and vanilla and almond extracts. Pour filling into crust.

Bake until filling is golden and set, about 40 minutes. Remove from oven, cool completely and then chill in fridge until cool. About 3 hours.

The Topping:

3/4 cup heavy whipping cream

2 tsp. powdered sugar

3/4 tsp. vanilla extract

8 thin lemon slices (optional – I didn’t use them)

Using your electric mixer, beat the cream, sugar and vanilla in a small mixing bowl until  stiff peaks form (please note this will take a while, even on whip setting). Fill a pastry bag with a star tip (or plastic bag with corner cut) and pipe around the edges of your pie.

The pie is yummy and the lemon flavor is outstanding. There was one tiny slice left this morning and that was my breakfast. Olivia wants 4 of them for her upcoming 14th birthday. I’ll probably just make 2.

Bacon Cheesecake with an assist from The Bacon Goddess

Bacon cheesecake is fleeting.

Bacon cheesecake is fleeting.

This is a recipe for a bacon cheesecake. If you like bacon, and you like cheesecake, you’re welcome…

This recipe is a combination of 2 different recipes with elements coming from the Bacon Goddess and other elements coming from the Baby Screamin its Head Off in the Middle of the Night and Ruinin my Life Pie, which is also posted on my blog.

This was created for a Friday afternoon gathering at my place of employment. It went over well. I’m not going to pull your leg, this is damn good.

The Bacon!:

10-12 strips (about 1 lb.) of thick-cut bacon, as lean as possible

Prep:

Pre-heat your oven to 400F. Cover a sheet pan in tin foil. Lay out the strips on your sheet and make sure they aren’t touching. They’ll stick together and won’t cook. Bake  it 15-20 minutes or until it looks crisp. Remove from oven and place on a plate with paper towels on it so it can cool and crisp. Once cooled, put it into a food processor and pulse it a couple of times so you have your crumble. Set aside.

Set your bacon grease aside. You’ll need it for your crust.

The crust!:

2c (about 2 packages) of graham crackers

2tbsp brown sugar

4tbsp butter, unsalted and melted

2tbsp bacon grease

About 3 tbsp bacon crumble (this isn’t science, you can use your judgement)

Prep:

Set oven to 350F. Liberally grease a 9 inch spring form pan. Break up your graham crackers into food processor and blend until fine. Add sugar and mix. Add melted butter and bacon grease and blend until it looks coarse. Add bacon crumble and pulse until blended. Dump your mix into spring form and press along bottom and up the sides a bit. Place on center rack of oven for 8-10 minutes. Keep an eye on it, you don’t want to burn it. Remove from oven and let cool completely. It should be cooled by the time you’re ready to pour the filling.

Keep your oven at 350F…

The filling!:

I'm cute AND delicious!

I’m cute AND delicious!

32oz. (4 8 ounce packages) cream cheese at room temperature

1 3/4c white sugar

2 tbsp vanilla extract

5 eggs

1 egg yolk

3/4 of your remaining bacon crumble

Prep:

In a large mixing bowl, blend your cream cheese until smooth. Add sugar and vanilla and blend until smooth. Add bacon crumble and combine. Add one egg at a time to your mix and blend just until combined. Don’t over blend, you get too much air in your mix and the cheesecake will fall. Add yolk and blend until combined. Scrape the sided with a rubber spatula and blend to make sure your filling is mixed well.

Grease the side of your spring form above the crust line.

Pour your filling into the spring form.

On the bottom rack of your oven, place a pan with about an inch of water in the pan. This helps reduce the possibility of cracks in the side and top of your cheesecake.  Place your cheesecake on the rack above the water pan.

For the results I got, bake for 42 minutes at 350F. At 42 minutes, open your oven,  take your remaining bacon crumble, and spread evenly over the top of the cheesecake. Put back in oven and bake an additional 3 minutes.  By now, your cheesecake should be a golden brown around the edges.

Turn off oven and remove cheesecake. Run a thin knife around inner edge of spring form so cheesecake properly detaches from pan as it cools. Put it back in oven and leave the door cracked, about 40 minutes. This allows it to finish baking as its cooling. Remove and chill in fridge about 3 hours or until you are ready to eat one of the best desserts you’ll have in your life:)

Bacon Cheesecake2

Uncle Nettie’s Secret Weapon

Andre photo bombs the secret weapon

Welcome through the doorway and into the holiday season. This recipe, a cherry pie baked into the center of a cheesecake, was created for a Halloween bake-off at work. I didn’t win any prizes for this although it was a dessert that disappeared.

This concoction is dedicated to a friend who recently flamed out. I found out the day I made this that he had decided to make the jump. In front of a train. A crazy pie for a wild and crazy guy (who was also ring bearer at my wedding). RIP Paul Addis, you would have liked this one, my friend. It’s called Uncle Nettie’s Secret Weapon…

You will need a 9 inch pie tin and a 10 inch spring form for this concoction. A food processor and a hand-held electric mixer would be helpful too.

Move your oven rack to a lower position. Pre-heat your oven to 350F.

The Crust:

1 1/4 cups unbleached all-purpose flour

1/2 tsp. sugar

1/4 tsp. salt

10 tbsp. (1 1/4 sticks) chilled unsalted butter, cut into 1/2 inch cubes

3 tbsp. cold water

In a food processor, mix the flour, sugar and salt. Add butter and blend using on/off turns. Process until coarse meal forms. Add water and blend using on/off turns. Add water by teaspoon if dough seems dry.

Butter or vegetable oil the inside of a 9 inch pie pan. A smaller pie tin would probably be best as you want to make sure the pie you put in the cake is a bit smaller and more dense. Dense is key as you don’t want the pie to come apart in transfer.

On a lightly floured surface, roll out the dough into a 12 inch diameter circle. Transfer to a 9 inch pie dish. Clip the dough to the edge of the pie tin. No need to flute or crimp the edges, it’s going into in a cheesecake.

Line the crust with foil and place dried beans or pie weights. Bake 10-15 minutes. Remove the foil and beans. Bake for another 10-15 minutes or until the crust is a light brown. Set aside to cool. Once cooled, create a tin foil collar for your crust, making sure your edges are covered. You don’t want to burn the edge when you bake the pie with the filling.

The Pie Filling:

2 16 oz. cans (equal to 4 cups) TART cherry pie filling

1/4 cup granulated white sugar, or as needed

2 1/2 tbsp. quick cooking tapioca

1/8 tsp. salt

1 tbsp. fresh lemon juice

1/2 tsp. pure vanilla extract

1 tbsp. cherry brandy

Place the cherries in a large bowl. Add the sugar, tapioca, salt, lemon juice, vanilla extract, and almond extract and mix with a large wooden or plastic spoon until joined. Pour the mixture into the baked pie shell. Spread the cherry filling to the tin foil collar.

Bake at 425F, for 30 minutes. Reduce heat to 350F and bake an extra 25-30 minutes.

Place on wire rack. Let cool completely. Transfer to fridge and allow 1-2 hours to chill. Two hours would be optimal.

Ready for the taste test

The Cheesecake:

4 8-oz. cream cheese (low-fat or regular), softened

1 cup unsalted butter, softened

1 1/2 cups sour cream

1/2 cup heavy whipping cream

1 3/4 cup white sugar

1/8 cup cornstarch

1 fluid oz. (shot) Cherry Brandy

1 tsp. vanilla extract

5 eggs

1 egg yolk

Bring all ingredients to room temperature.

Pre-heat oven to 375 degrees. Wrap outside of 10-inch spring form pan with foil. Butter the inside of your spring form.

In large bowl, blend cream cheese and butter until smooth. Mix in sugar and cornstarch. Blend in sour cream and whipping cream. Add cherry brandy and vanilla. Stir in eggs and egg yolk one or two at a time, mixing thoroughly between each addition.

Pour half the batter into your spring form. Separate your chilled pie from the pie tin (we lined a plate with plastic wrap and turned the pie upside to separate). Remove the plastic wrap from the top of the pie. Place the pie into the cheese cake mix. Pour the remaining batter over the top of the pie. Place the spring form in another pan at least 1 inch wider and add at least one inch of water to outside pan (prevents cracks in sides of the cheesecake). Bake on center rack for approx. 80-90 minutes or until the top of your cheesecake is a golden brown.

Turn oven off and let cool with door open for 1 hour. Remove cake from water and chill at least 3 hours before removing cake from spring form pan.

We sampled some before I brought it in to work just to be sure it was ok;) My wife liked the tartness of the cherry pie. The kids didn’t. I thought it could be a little more sweet but that’s my taste. The cheesecake itself seemed a bit flat and not as fluffy as your usual cheesecake. Then again, it had a pie in the middle of it.

My recommendation would be to add your own flavor to this and build on the beta version of this creation.

Shine on, Paul. You will always be in my heart.