A Lazy Man’s Cherry Pie

It’s the first day of spring:) The weather is getting warmer in Austin (it was 76F today) and it’s almost time to go out and clear the dead crap from the yard. That’s something for the weekend if it doesn’t rain, but for today there was a need for pie. Problem is I’m feeling lazy and didn’t want to create something from scratch. So I grabbed a few things from the fridge and the cupboard and made a lazy man’s cherry pie. You can never go wrong with cherry pie, especially on the first lazy day of spring.

The crust:

2 pre-made, 9 inch, deep dish pie shells

1 tbsp. milk

Pre-heat oven to 425F. Pull pie shells from freezer and let thaw for 15 minutes. Separate one from the tin and roll it flat on a floured cutting board. You know, so it doesn’t stick. Set the milk aside to bind the top shell to the bottom shell when it’s time to bake.

The filling:

1 1/4 lbs. pitted, red tart cherries OR 2-14.5 oz. cans of Lucky Leaf cherries (I was lazy so guess which way I went)

1 cup sugar

3 tbsp. corn starch (if you don’t have corn starch, you can use 1/3 cup of all-purpose flour)

1 tbsp. butter or margarine

1 cup of water (If you use the canned cherries, set aside one cup from the cans)

In a medium sauce pan, combine the sugar and cornstarch. Add the water and mix until smooth. Stir over medium heat until mixture is thick and it bubbles. Continue to stir for an additional minute. Remove from heat and add cherries and butter.  Combine and pour into your pie crust. Brush the edge of the bottom crust with milk and place your cutting-board pie crust on top. Flute the crust and cut a slit in middle to vent.

Bake at 425F for 10 minutes. Reduce temperature to 350F and bake an additional 25-35 minutes or until the top crust is a golden brown. Remove from oven and let cool for a couple of hours. Dig in.

My vent didn’t work too well as you can see. But the pie was pretty tasty and not too sweet. I would recommend adding some whipped cream or vanilla ice cream to add to it.

If you’re anything like me, I hope that spring is a way better time in 2014 than winter. I think it’s time to look for a few other recipes to try out.

Cherry pie

We have center vent fail.

..

Advertisement

Uncle Nettie’s Secret Weapon

Andre photo bombs the secret weapon

Welcome through the doorway and into the holiday season. This recipe, a cherry pie baked into the center of a cheesecake, was created for a Halloween bake-off at work. I didn’t win any prizes for this although it was a dessert that disappeared.

This concoction is dedicated to a friend who recently flamed out. I found out the day I made this that he had decided to make the jump. In front of a train. A crazy pie for a wild and crazy guy (who was also ring bearer at my wedding). RIP Paul Addis, you would have liked this one, my friend. It’s called Uncle Nettie’s Secret Weapon…

You will need a 9 inch pie tin and a 10 inch spring form for this concoction. A food processor and a hand-held electric mixer would be helpful too.

Move your oven rack to a lower position. Pre-heat your oven to 350F.

The Crust:

1 1/4 cups unbleached all-purpose flour

1/2 tsp. sugar

1/4 tsp. salt

10 tbsp. (1 1/4 sticks) chilled unsalted butter, cut into 1/2 inch cubes

3 tbsp. cold water

In a food processor, mix the flour, sugar and salt. Add butter and blend using on/off turns. Process until coarse meal forms. Add water and blend using on/off turns. Add water by teaspoon if dough seems dry.

Butter or vegetable oil the inside of a 9 inch pie pan. A smaller pie tin would probably be best as you want to make sure the pie you put in the cake is a bit smaller and more dense. Dense is key as you don’t want the pie to come apart in transfer.

On a lightly floured surface, roll out the dough into a 12 inch diameter circle. Transfer to a 9 inch pie dish. Clip the dough to the edge of the pie tin. No need to flute or crimp the edges, it’s going into in a cheesecake.

Line the crust with foil and place dried beans or pie weights. Bake 10-15 minutes. Remove the foil and beans. Bake for another 10-15 minutes or until the crust is a light brown. Set aside to cool. Once cooled, create a tin foil collar for your crust, making sure your edges are covered. You don’t want to burn the edge when you bake the pie with the filling.

The Pie Filling:

2 16 oz. cans (equal to 4 cups) TART cherry pie filling

1/4 cup granulated white sugar, or as needed

2 1/2 tbsp. quick cooking tapioca

1/8 tsp. salt

1 tbsp. fresh lemon juice

1/2 tsp. pure vanilla extract

1 tbsp. cherry brandy

Place the cherries in a large bowl. Add the sugar, tapioca, salt, lemon juice, vanilla extract, and almond extract and mix with a large wooden or plastic spoon until joined. Pour the mixture into the baked pie shell. Spread the cherry filling to the tin foil collar.

Bake at 425F, for 30 minutes. Reduce heat to 350F and bake an extra 25-30 minutes.

Place on wire rack. Let cool completely. Transfer to fridge and allow 1-2 hours to chill. Two hours would be optimal.

Ready for the taste test

The Cheesecake:

4 8-oz. cream cheese (low-fat or regular), softened

1 cup unsalted butter, softened

1 1/2 cups sour cream

1/2 cup heavy whipping cream

1 3/4 cup white sugar

1/8 cup cornstarch

1 fluid oz. (shot) Cherry Brandy

1 tsp. vanilla extract

5 eggs

1 egg yolk

Bring all ingredients to room temperature.

Pre-heat oven to 375 degrees. Wrap outside of 10-inch spring form pan with foil. Butter the inside of your spring form.

In large bowl, blend cream cheese and butter until smooth. Mix in sugar and cornstarch. Blend in sour cream and whipping cream. Add cherry brandy and vanilla. Stir in eggs and egg yolk one or two at a time, mixing thoroughly between each addition.

Pour half the batter into your spring form. Separate your chilled pie from the pie tin (we lined a plate with plastic wrap and turned the pie upside to separate). Remove the plastic wrap from the top of the pie. Place the pie into the cheese cake mix. Pour the remaining batter over the top of the pie. Place the spring form in another pan at least 1 inch wider and add at least one inch of water to outside pan (prevents cracks in sides of the cheesecake). Bake on center rack for approx. 80-90 minutes or until the top of your cheesecake is a golden brown.

Turn oven off and let cool with door open for 1 hour. Remove cake from water and chill at least 3 hours before removing cake from spring form pan.

We sampled some before I brought it in to work just to be sure it was ok;) My wife liked the tartness of the cherry pie. The kids didn’t. I thought it could be a little more sweet but that’s my taste. The cheesecake itself seemed a bit flat and not as fluffy as your usual cheesecake. Then again, it had a pie in the middle of it.

My recommendation would be to add your own flavor to this and build on the beta version of this creation.

Shine on, Paul. You will always be in my heart.

And Pie #52…The Cherry Bomb

Before I start on my pie blog swan song, I’d like to send healing thoughts and hope for a speedy recovery to my Aunt Judy in Nashville who’s very ill. Please get well soon.

The cherry bomb cleverly disguised as a chocolate cake

Happy Thanksgiving to all of you:)

A year ago I decided to do a pie a week and blog about it. It’s been an experience part exciting, boring, humorous, fun, not-so-fun, and an all-around pleasant learning experience (I still need to work on my crust skills though…). For those of you who followed along, thank you. Thank you for asking me how things were going and staying interested. And in doing so, keeping me interested. 

I hope you’ve used this small library of classic and unique recipes and I also hope you had an even better go of it than I did:) I also hope you continue to use it. For anyone coming along after the fact, thank you for looking around. I hope you find something that you would like to try, and something that you enjoy.

This has also been a marker of time and happenings in the past year. Nothing too crazy but certainly some sadness and some excellent times, and everything in between. As it should be, it has been a mix. It also marks a transition. It’s re-kindled my desire to get out and do new things. So, I will shortly be fostering of a reasonable number of Siamese cats and volunteering with Austin Siamese Rescue and Austin Pets Alive! Joining me on this adventure is my lovely wife. Yay! Doing good deeds together:) Maybe I can blog about that too.

Pie number 52 was something I couldn’t think of a good name for. So I asked my friends on that-social-network-thing for a name and gave them the description; a cherry pie baked inside a chocolate cake and frosted with a semi-sweet chocolate and sour cream frosting. I got some good names and umm, some abstract. I decided to go with The Cherry Bomb. It has a nice ring to it. Thanks Heidi.

My final concoction is inspired by Kate Orenberg over at Summer of Pie. You can find her story of the epic Capownie here. I initially wanted to do her recipe, which is 6 pages long. It also requires baking tools I couldn’t McGyver. So I went with a toned down version of her larger concept and created a flavor concoction that my wife came up with. My recipe was 3 pages, which makes sense. Kate created a double-decker. And she did it over the course of a week. I just didn’t have that kind of time.

I started putting this together Wednesday at 8am. I finished it around 9:30pm. In between, I also made Baby-Screamin its Head Off in the Middle of the Night and Ruinin my Life Pie, helped Tammi braise a turkey, and did a couple of other things to get my Thanksgiving on.  This modipied creation was a bit of work but, after sampling the wares as it was coming together, I think this is going to rock.

The Crust!:

1 1/4 cups unbleached all-purpose flour

1/2 tsp. sugar

1/4 tsp. salt

10 tbsp. (1 1/4 sticks) chilled unsalted butter, cut into 1/2 inch cubes

3 tbsp. cold water

In a food processor, mix the flour, sugar and salt. Add butter and blend using on/off turns. Process until coarse meal forms. Add water and blend using on/off turns. Add water by teaspoon if dough seems dry. Gather dough into a ball, flatten and chill for at least one hour.

Kinda looks like a cherry filled brownie in this picture

Line the inside of a 9 inch pie pan with tin foil. Wrap the edges down and under the side of the tin. A smaller pie tin would probably be best as you want to make sure the pie you put in the cake is a bit smaller and more dense. Dense is key, you don’t want the pie to come apart in transfer. That would be no bueno.

On a lightly floured surface, roll out the dough into a 12 inch diameter circle. Transfer to a 9 inch pie dish. Trim the edges to 1/2 inch off side. Fold the extra dough under the edge. Don’t worry about fluting or crimping your edge. Nobody is going to see it unless they excavated their cake.  Chill at least an hour.

Pre-heat your oven to 350F. Line the crust with foil and place dried beans or pie weights. Bake 20 minutes. Remove the foil and beans. Bake for another 10-15 minutes or until the crust is a light brown. Set aside to cool. Once cooled, create a tin foil collar  for your crust, making sure your edges are covered. You don’t want to burn the edge.

The Filling!:

2 16 oz. cans (equal to 4 cups) cherry pie filling

1/4 cup granulated white sugar, or as needed

2 1/2 tbsp. quick cooking tapioca

1/8 tsp. salt

1 tbsp. fresh lemon juice

1/2 tsp. pure vanilla extract

1 tbsp. cherry brandy

Place the cherries in a large bowl. Add the sugar, tapioca, salt, lemon juice, vanilla extract, and almond extract and mix with a large wooden or plastic spoon until joined. Pour the mixture into the baked pie shell. Spread the cherry filling to the tin foil collar.

Bake at 425F, for 30 minutes. Reduce heat to 350F and bake an extra 25-30 minutes.

Place on wire rack. Let cool completely. Transfer to fridge and allow at least an hour to chill. Two hours would be better. It really needs to set.

Chocolate Cake!:

3 cups cake flour

3 cups sugar

½   tsp. baking soda

1½   tsp. salt

¾ tsp. baking powder

1 cup water

1 cup buttermilk

3/4 cup shortening

3 eggs

2 tsp. vanilla

6 squares unsweetened chocolate, melted and cooled ( use a microwave safe bowl, and nuke it for a couple of minutes, stirring frequently)

Preheat oven to 350°F.

Not a cherry filled brownie.

Spray oil and flour 10 inch springform pan, removing excess flour.

In a large mixing bowl, combine all ingredients. Blend for 30 seconds on low-speed, stopping to scrape sides and bottom of bowl occasionally.

Beat for 3 minutes at medium speed.

Pour enough batter to have a ½ inch platform to allow pie to sit on. Bake 5-10 minutes or until batter is just firm enough to hold pie.

Unwrap the tin foil collar from the crust. Using the tin foil you lined your pie tin with, loosen and lift the cherry pie from your pie tin. Transfer your cooled cherry pie to the 10 inch springform pan.

Pour remaining batter into srpingform. Bake for 40-50 minutes, or until a toothpick inserted in center of cake comes out clean.

Let cool for at least 4 hours. Using a butter knife, run along outer edge of cake to separate from the springform. Remove springform. Place back in fridge until you are ready to frost.

The Frosting!:

1 (12 oz.) bag chocolate chips

1 cup sour cream

1 tsp. vanilla

In a medium sauce pan, let chips slowly melt over low heat. Remove from heat and let stand for 5 minutes. Stir in sour cream and vanilla. It’s ready to spread.

Remove your cherry occupied cake from the fridge and frost away. When done, you should have some extra frosting. Find a good cookie and dip that bad boy into the remaining frosting and enjoy.

I had a small gathering of friends eager to see the result and it turned out quite well. I actually had pie-parazzi snapping photos and videos of the cutting of the cake. Kinda felt like I was at my wedding again:) The entire thing was dense but had a good flavor and the chocolate/cherry mix really was the bomb. I have some left over if you want to stop by and try it:)

I’m so glad I did this. I have the disherprin. I may do a few more recipes periodically depending on what I find, or what I feel I can make up. But for now, I have achieved the goal I set for myself and this makes me happy. Have a great holiday season and take care.

Pie #43 – Cherry Pie with Lattice top

I took my wife to Sonoma, CA for the weekend in celebration of her 40th birthday. It was also our 5th wedding anniversary.  So it all came together quite nicely. We invited 15 of our friends to a beautiful and large home called Artisan House on the Russian River. It was truly a great weekend of fun and laughs. With a hot tub. In a small amount of spare time, I baked pie 43, a cherry pie with a lattice top.

Pie by the Russian River

The crust!:

2 ready-made pie crusts (hey, I was on vacation)

The filling!:

4 cups cherries (fresh or frozen)

1/2 tsp. cinnamon

1/4 cup unbleached flour

1 cup sugar

Thaw one of your ready-made pie crusts. You’ll cut that for your lattice.

Mix cherries, flour, cinnamon and sugar into a large mixing bowl. Pour into your frozen pie shell.

Flatten your thawed pie crust. Cut lattice from your thawed crust and weave on top of the pie. Pinch the edges to the shell.

Bake at 425F, for 30 minutes. Reduce heat to 350F and bake an extra 25-30 minutes or until crust is light brown.

It was really tasty and had a nice hint of the cinnamon. It was also quite juicy and sweet. Just like our weekend! All of our friends who tried it really liked it too.

Pie #35 – Cherry Teleport Whipped Cream Pie

Last week, I was watching Through The Worm Hole with Morgan Freeman. The episode talked about long distance space travel. One of the segments discussed teleportation. It involves dematerializing something at one point, and transmitting the details of that particular object’s precise atomic configuration to another place in space. Big thinking to be sure. The scientist used a pie and blended it as a metaphor for teleporting. He blended that pie to show how information changes if it were to move from one point in space to another. It would be a scramble. I thought that was brilliant. Not using the pie as a metaphor, but baking a pie, blending it, and reconstituting it . So pie 35 is the cherry teleport whipped cream pie. The pie recipe came from Joy of Baking, but with a few mods.

The Pate Brisee (Fancy term for Short Crust Pastry, makes 2 crusts)!:

2 1/2 cups all-purpose flour

1 tsp. salt

2 tbsp. granulated white sugar

1 cup unsalted butter, chilled, and cut into 1 inch pieces

1/4 to 1/2 cup ice water

In a food processor, place the flour, salt, and sugar and process until joined. Add the butter and process until the mixture resembles coarse meal (about 15 seconds). Pour 1/4 cup  water in a slow, steady stream, through the feed tube

The cherry pie before its perilous journey

until the dough just holds together when pinched. If necessary, add more water. Do not process more than 30 seconds.

Turn the dough on your work surface and gather into a ball. Divide the dough in half, flattening each half into a disk, cover with plastic wrap, and refrigerate for at least one hour.

After the dough has chilled sufficiently, remove one part of the dough from the fridge and place it on a lightly floured surface. Roll the pastry into a 12 inch circle. Transfer to a 9 inch (23 cm) pie pan. Brush off any excess flour and tuck the overhanging pastry under itself, crimping as desired. Refrigerate the pastry, covered with plastic wrap.

Remove the second round of pastry and roll it into a 12 inch circle. Place on a parchment paper-lined baking sheet, cover with plastic wrap, and place in the refrigerator.

I also made a third crust for the end point of my teleportation:

The crust, part 2 (a basic crust)!:

1 cup all-purpose flour

1/8 tsp. salt

1 quarter cup granulated sugar

1/2 cup cold, unsalted butter (that’s one stick of butter)

1 large egg yolk

1-2 tsp. ice-cold water

Science!

Combine the flour, salt and sugar in a medium-sized bowl. Cut the butter into small chucks and add to the flour mixture. Using a pastry blender or two knives in a criss-cross motion, blend the butter into the mixture until it has the consistency wet sand (sweet, delicious wet sand)with a few pea-sized pieces remaining.

Using a fork or whisk, beat the egg yolk and the water. Pour the egg mixture over the flour, stirring only until the mixture becomes moist. The dough should stick together and be able to hold the form of a ball. Cover the dough with plastic wrap and flatten into a disk. Chill in the fridge a minimum of 30 minutes.

To roll it out, I used a cloth dinner mat. Flour the surface, cover the dough with your plastic wrap and roll out into a 9 inch circle. Transfer to a 9 inch pie plate. Trim or fold the excess under the edge of the crust and flute. Place a pie weight or beans in tin foil over the center of the crust.

Bake at 350 degrees for 10 minutes. Remove the weight from the crust and bake an extra 7-9 minutes or until the edges are golden brown. Set aside to cool.

The Filling!:

4 cups pitted, sweet or tart fresh cherries (can also use 4 cups sweet or  tart canned or bottled cherries, drained with 1/3 cup cherry juice reserved)

3/4 cup granulated white sugar, or as needed

2 1/2 tbsp. quick cooking tapioca

1/8 tsp. salt

It's still a cherry pie, its data is just altered. And delicious.

1 tbsp.  fresh lemon juice

1/2 tsp. pure vanilla extract

Whipped Cream Topping:

1 1/2 cups heavy whipping cream

2 tbsp. sugar

1 tbsp. cherry brandy

Pre-heat the oven to 425F and place the oven rack in the lower third of the oven.

Place the cherries in a large bowl. Add the sugar, tapioca, salt, lemon juice, vanilla extract, and almond extract and gently toss to combine. (If using canned cherries also add the 1/3 cup reserved cherry juice.) Let sit for about 10-15 minutes and then pour the mixture into the prepared, unbaked pie shell and dot with the 2 tbsp. of butter. Lightly brush the rim of the pastry shell with the heavy whipping cream. Cover top with your second pie crust and cut slits ( or your own design) to vent. Brush the entire surface with the cream.

Place the pie on a larger baking pan, lined with parchment paper, to catch any spills. Bake the pie for about 15 minutes and then reduce the oven temperature to 350F. Continue to bake the pie for about 25 – 35 minutes or until the crust is a deep golden brown color and the cherry juices are starting to bubble. If the edges of the pie start to brown too much during baking, cover with a foil ring.

Place the baked pie on a wire rack to cool for several hours.
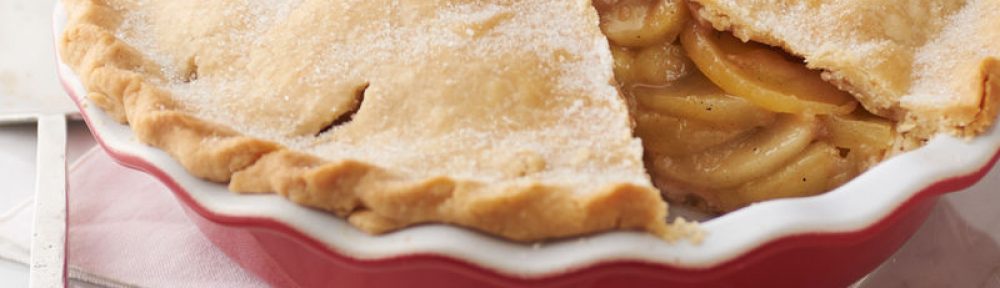
Cherry Pie Pie

Once pie has cooled, cut it up and throw it into a blender. I used a Vita-Mix. Blend for 1-2 minutes. I was able to get the pie blended but the Vita Mix kicked it. My wife is gonna be maaaaad. Pour the blended pie into your baked pie crust.

In a large bowl combine the heavy cream, sugar and brandy. Whip until stiff. spoon over the filling. Be wary of adding too much booze, my whip cream fell and now looks strangely like tapioca. Fail.

It should last 3 days in fridge.

A couple of things:

In 1993, physicist Charles Bennett and a team of researchers at IBM confirmed that quantum teleportation was possible, but only if the original object being teleported was destroyed.  Check. I’m ahead of the curve. I destroyed 2 things.

Since that time, experiments using photons have proven that quantum teleportation is in fact possible. I’m afraid that, in this day and age, with something as large as a pie, there will be a few manual processes to make this work. This, in project management parlance, is what is known as “semi-automation. If I were a cynic, it would also be known as “make work.”

Then there’s that whole it’s-not-the-same-pie thing. It’s like that movie with Jeff Goldblum. The one where he transports but there’s a fly in the transporter. Same thing happens with pie.

On the taste side of things, the cherry flavor doesn’t pop like I thought it would. And the texture of the whipped cream needs some improvement. It’s also really heavy. Like pudding.  It’s still good but doesn’t really excite. Oh, the things I do in the name of science.